The logo for archiform design restore and remodel

Site Measures – Part 3: Capturing Structural Systems

A room with a ceiling that has a skylight in it

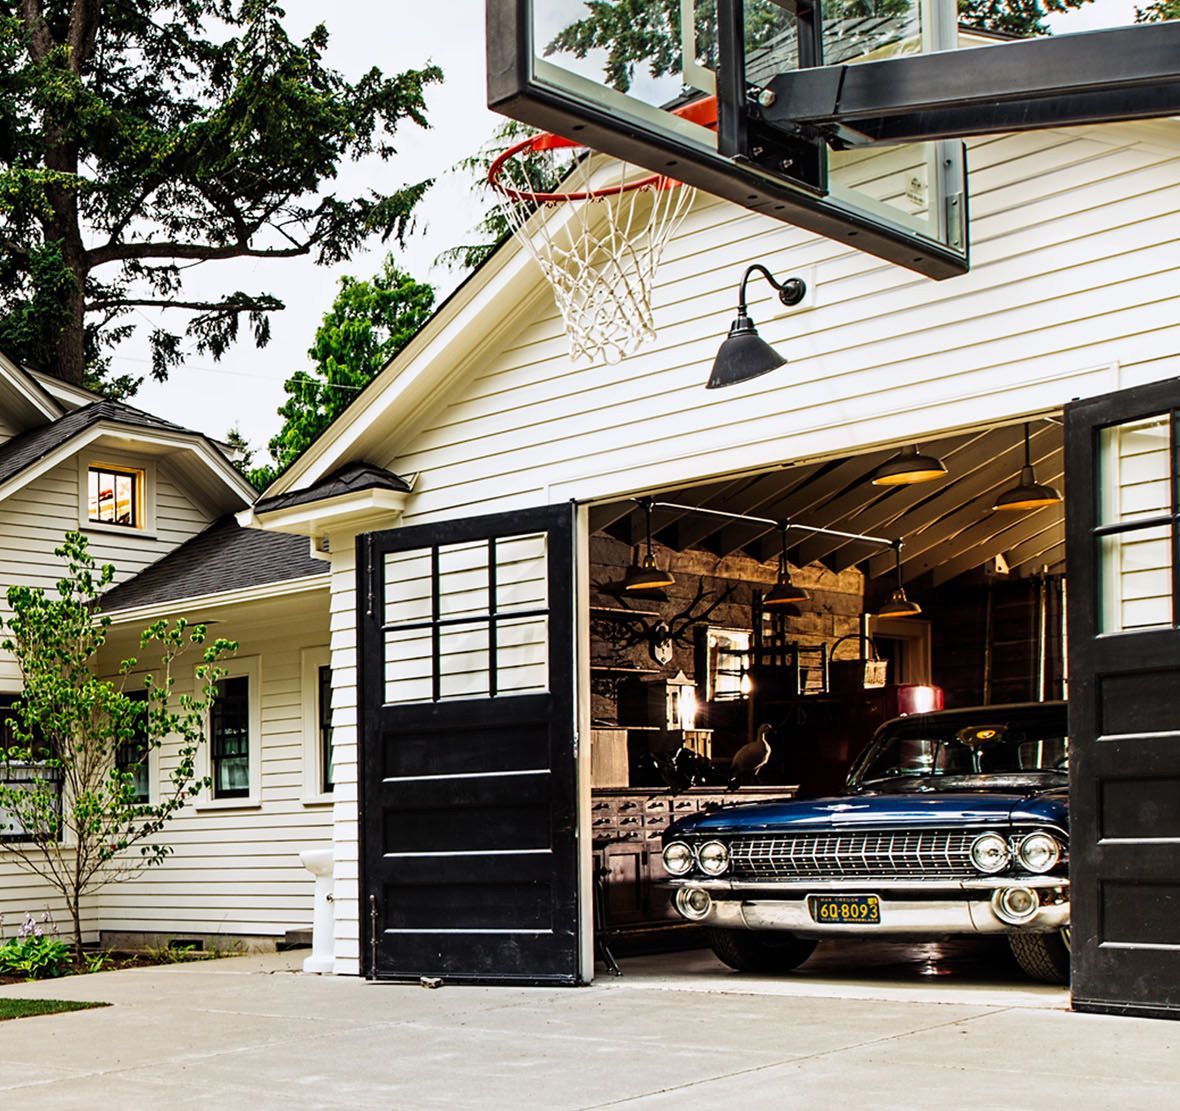
Exposed framing and structural members during the transformation of an existing garage into an ADU.

We often hear people say, “this house has good bones”, but what does this mean? This refers to all the structural members of the home coming together to make a strong skeleton that supports the building, giving it structural integrity. During site measures it is important to collect as much data as possible on how the home is built and supported so that we, and our engineers, can properly plan changes.


When planning structural changes to a home, we have a top-down and outside-in approach. You can’t take a wall out without thinking first about what is above and below it. This is because loads transfer down through gravity, becoming heavier as they travel toward the foundation.


Other aspects we consider are wind and earthquake forces, which put sideways pressure on a home. These were considered much less in older Portland homes but need to be addressed today. Capturing the size, spacing, and layout of each structural component helps us to determine if additional support is needed to make changes for a remodel.


Let’s start at the top:

Rafters: Rafters are the structural members that support the roof of a building. Since roofs are generally pitched, and we do not get much snow in Portland, they were, on average, not sized very large in old Portland homes. The lower the roof pitch or the longer the span, the bigger they get and/or the closer they are spaced together. Sometimes, there are intermittent walls that transfer onto the floor or ceiling joists if the span gets too long. The rest of the load gets transferred onto the perimeter walls.

A man in a green shirt is working in an attic.
A black car is parked in a garage with a red refrigerator

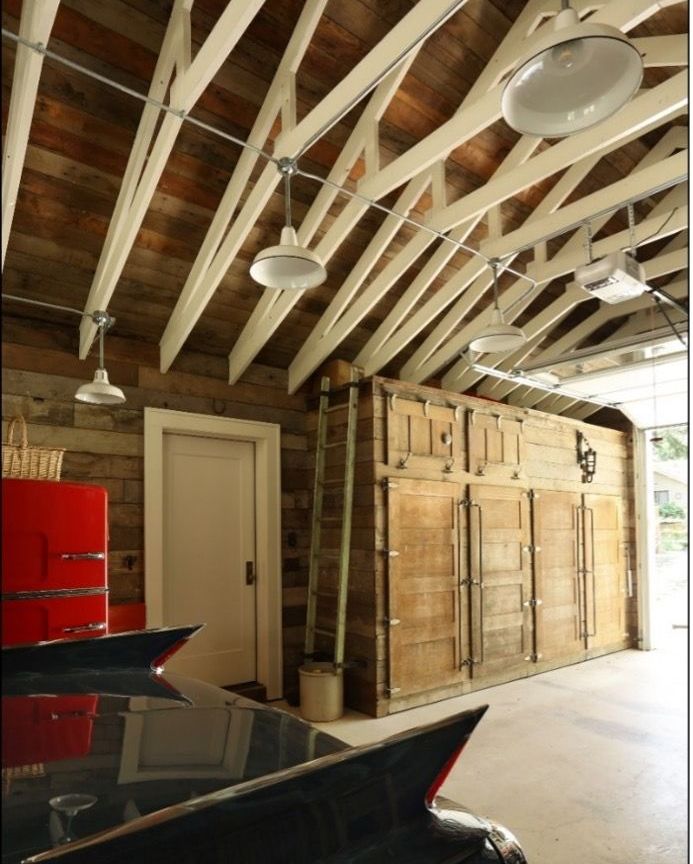
In this 1920 garage, trusses were redesigned to accommodate a grading issue that caused the garage door to impede the plane of conventional truss design. Framing members were upsized, and we created a vaulted scissor truss.

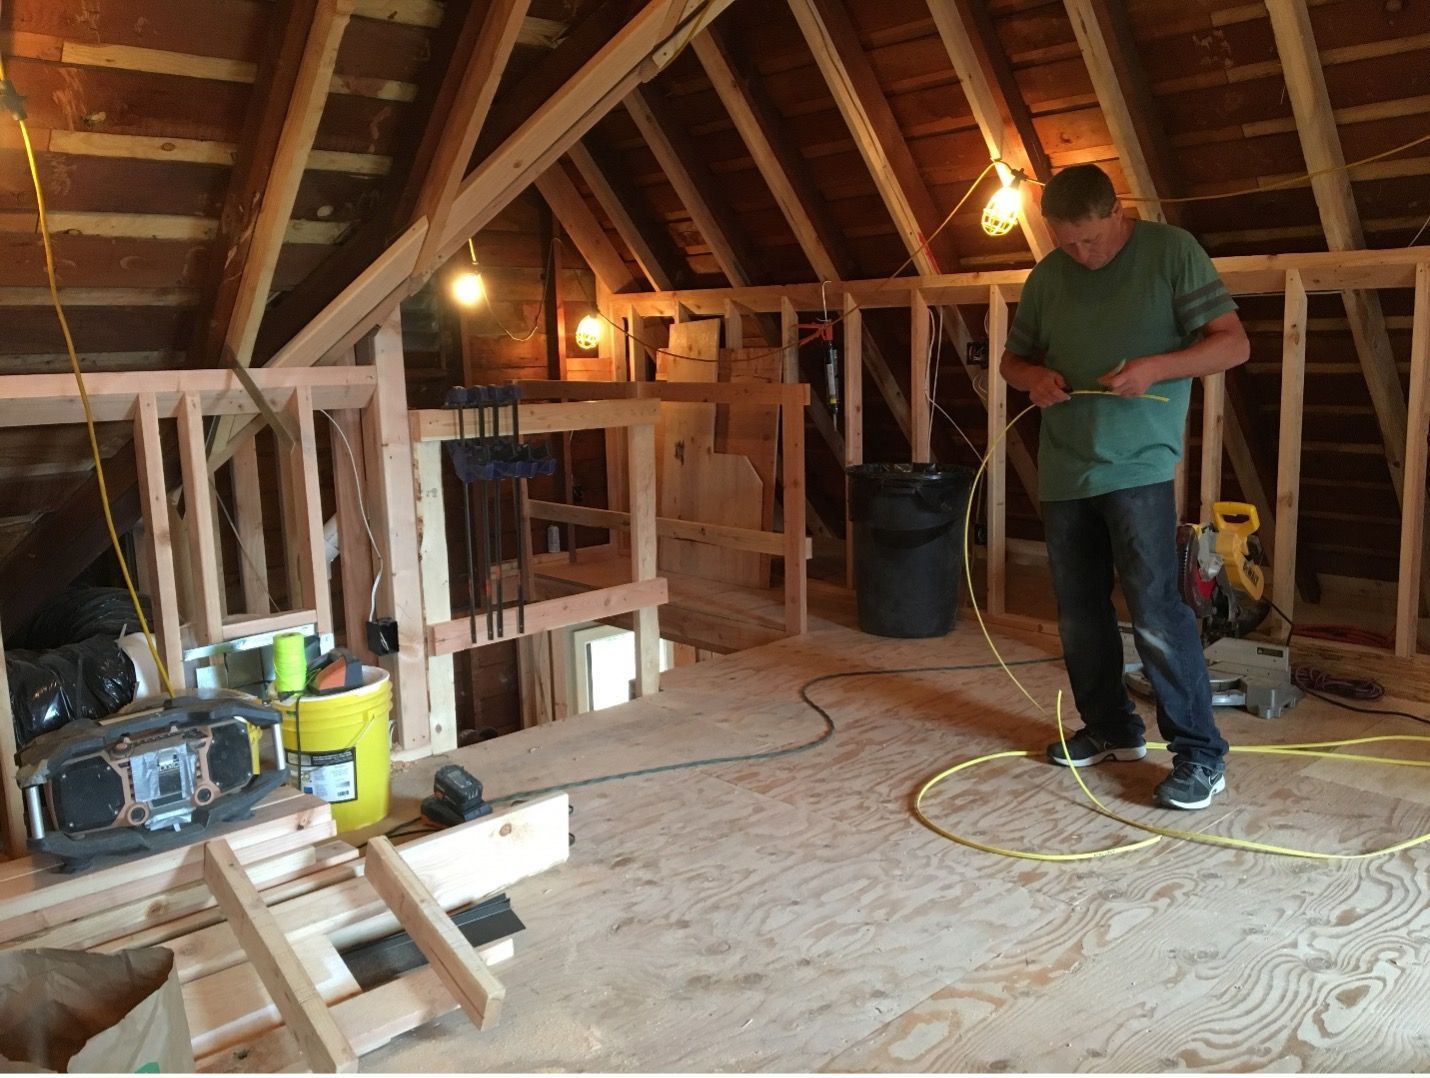
Ceiling / Floor Joists: Joists are the horizontal framing members between different levels. Sometimes joists are easy to see and measure, such as in unfinished basements and attics; other times, they are completely hidden within the structure. There are a couple of tricks to measure joists when they are concealed:New paragraph

A room that is being remodeled with a table saw and a vacuum cleaner.

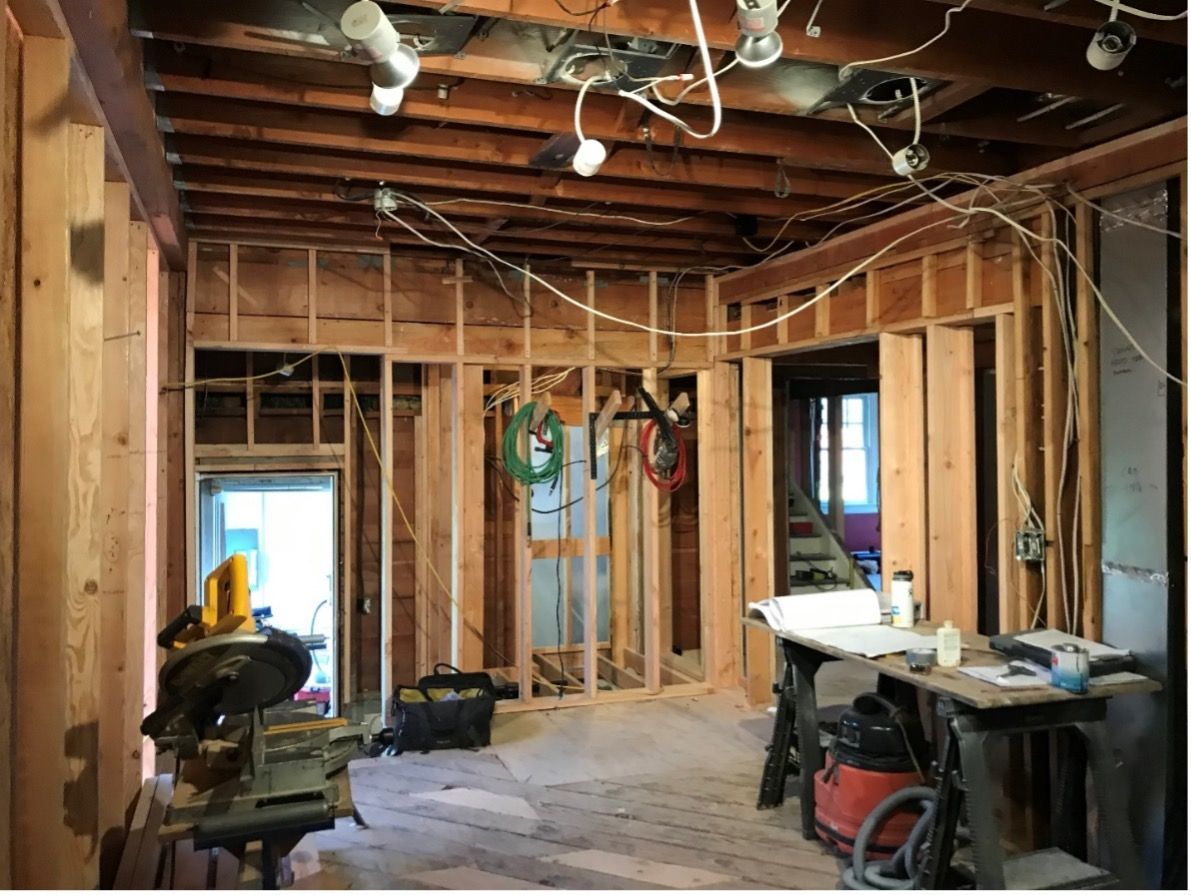
Joists above the kitchen were fully exposed during this remodel and addition

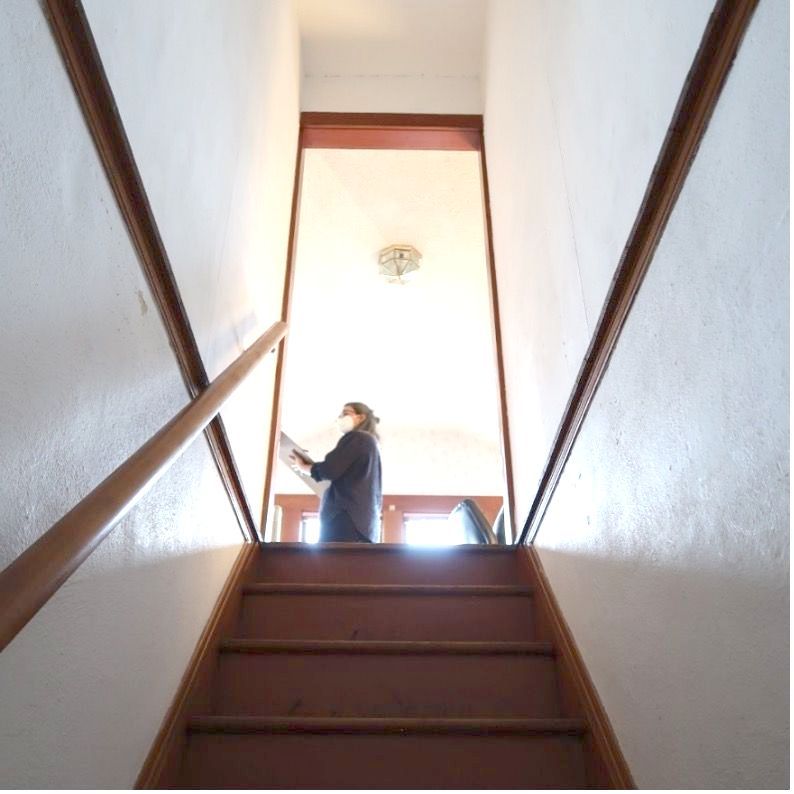
If a stairwell has an open side, with no wall below, you can measure the thickness of the floor platform, subtracting average flooring, subfloor, and ceiling drywall sizes from this measurement to get the joist size. 


If a stairwell is enclosed, you can add up the stair risers and subtract the ceiling height of the floor below and the floor, subfloor, and ceiling surface depths.

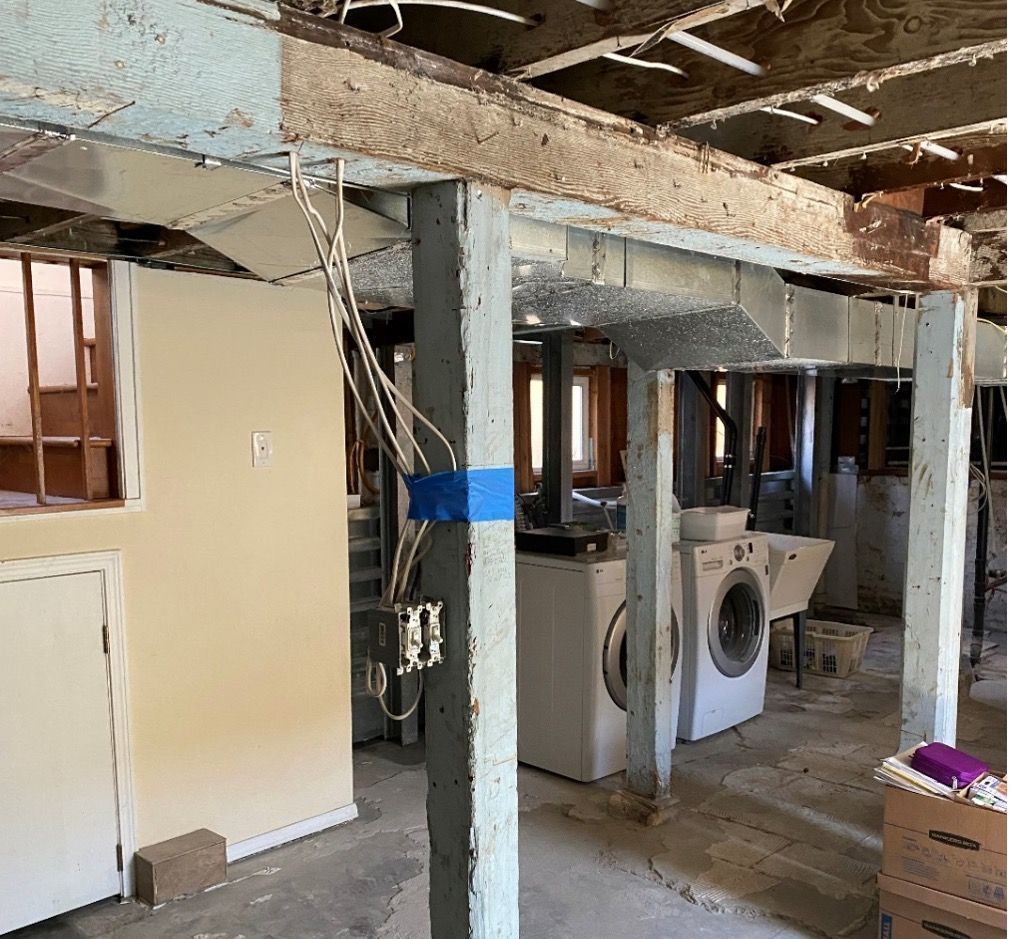
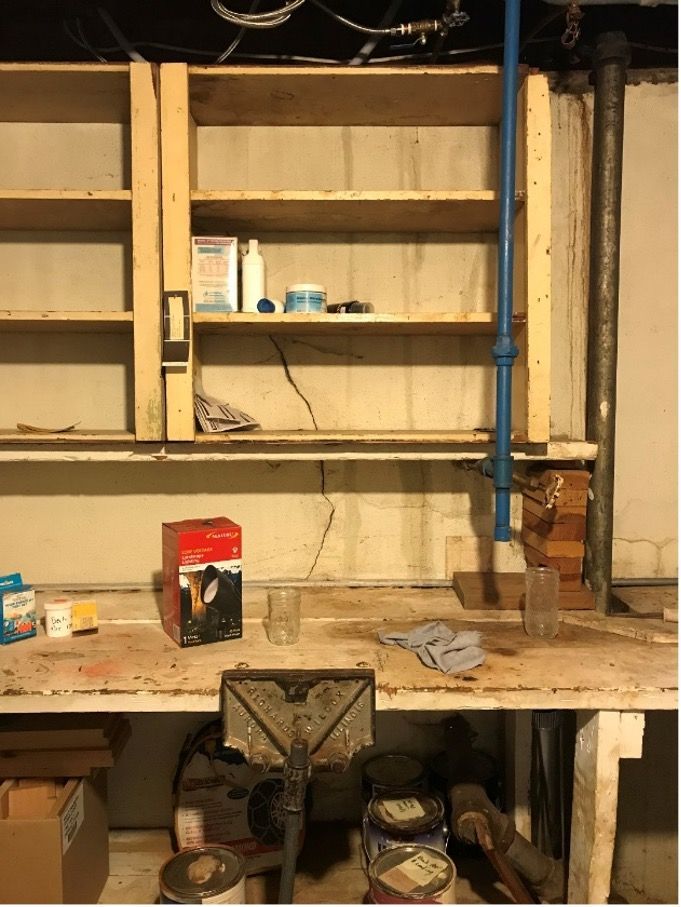
Post & Beams: Old Portland homes often have unfinished basements. Posts with footings and beams or walls with continuous footings support the long spans of joists above. The ends of the beams are supported by the perimeter concrete walls. The beams run perpendicular to the joists. Locating posts and beams is crucial for basement remodels since it is more cost effective to plan around their locations.

A basement with a washer and dryer in it

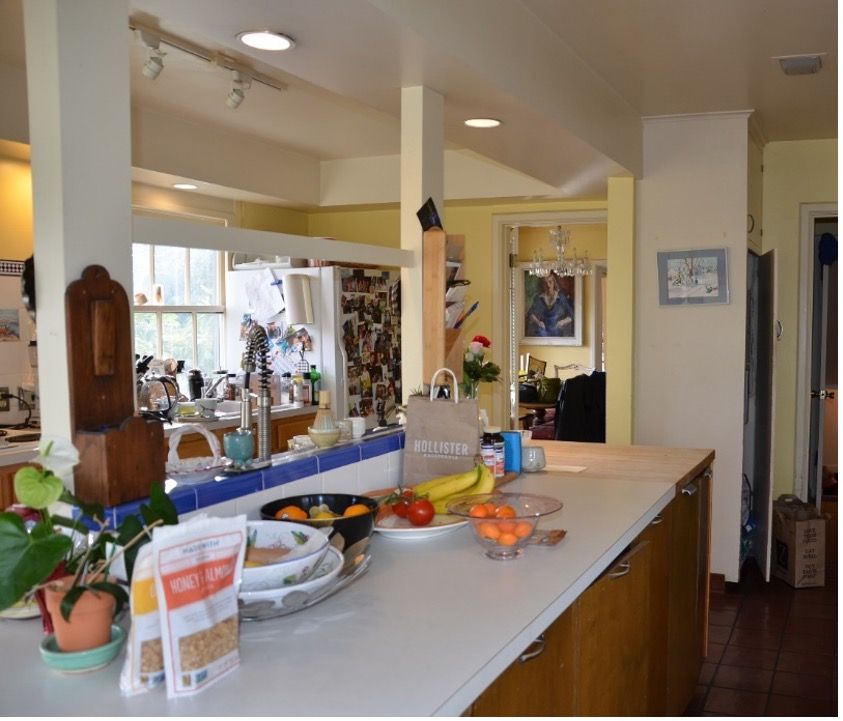
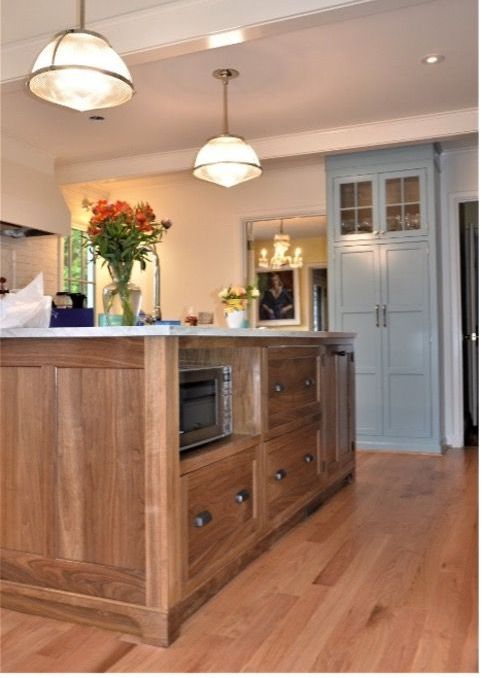
Before (left), a large beam ran down the middle of this kitchen, cutting the room in two above the island. After (right), two beams, set perpendicular to the original, open the space, provide structural support, and create a more harmonious feel.

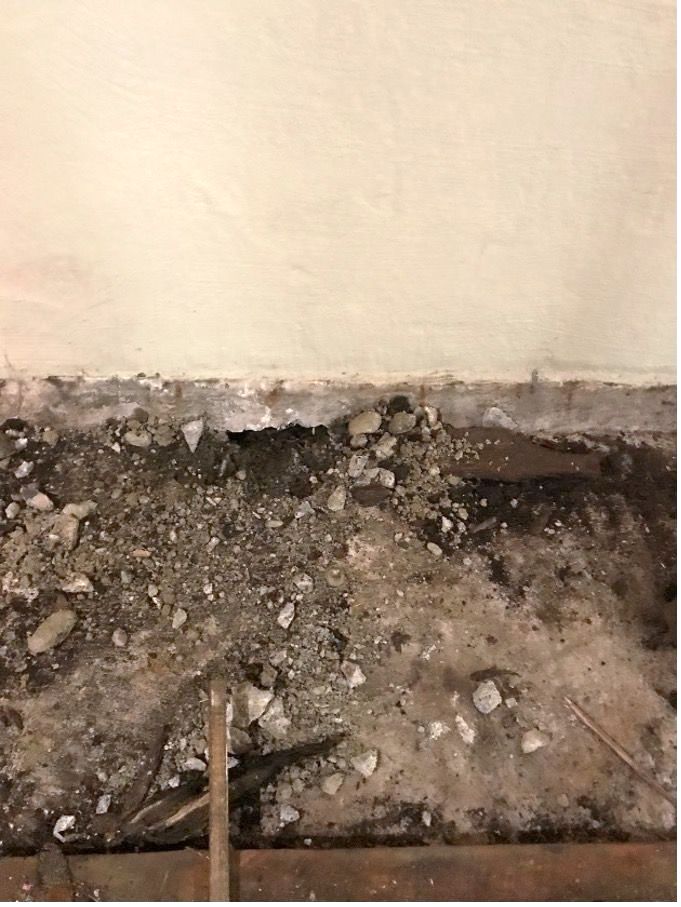
Foundation: Foundations transfer loads from the structure to the soil, similar to the roots of a tree. It is important to investigate the condition of a foundation in order to find any cracks or crumbling areas that might compromise the strength of the structure.

Sheathing:  And last, but by no means least, is the sheathing that holds all of the framing together and prevents the structure from racking and shimmying. While the bones were nicely sized in old Portland homes, sheathing did not quite catch on until the mid to late 1920’s. Often siding was directly attached to framing, and then horizontal shiplap provided some stiffness. Better stiffness was affected by diagonal shiplap, and, ultimately, with the invention of plywood, our current shear systems became standards.

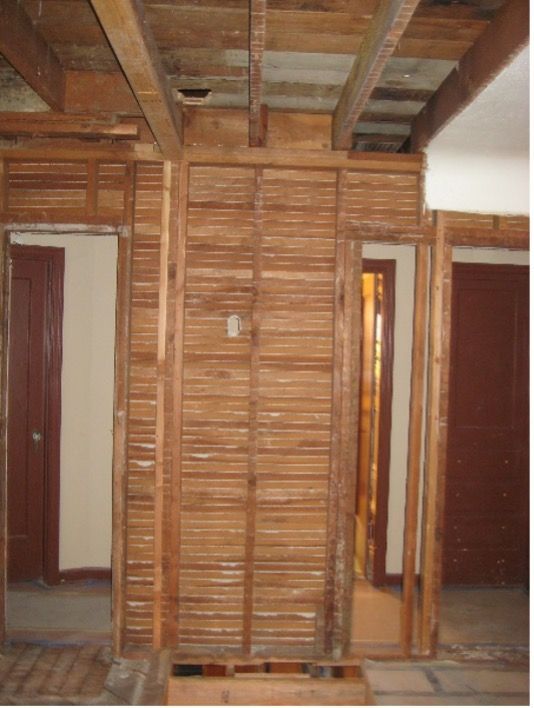
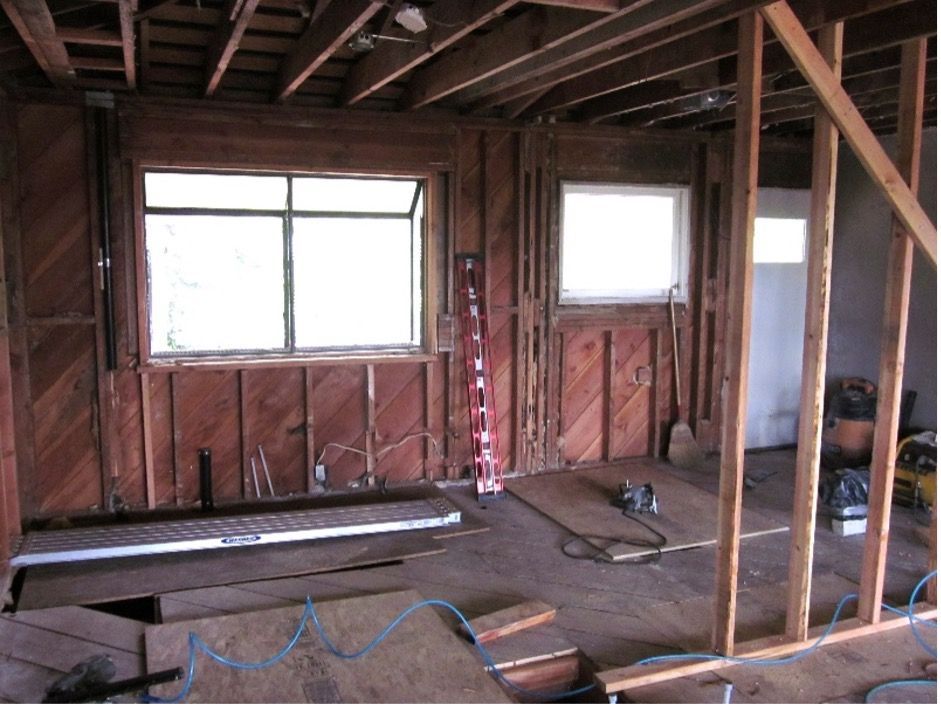
Left: horizontal sheathing in a 1920s home. Right: diagonal sheathing in a 1960s home

A diagram showing the parts of a typical shear wall

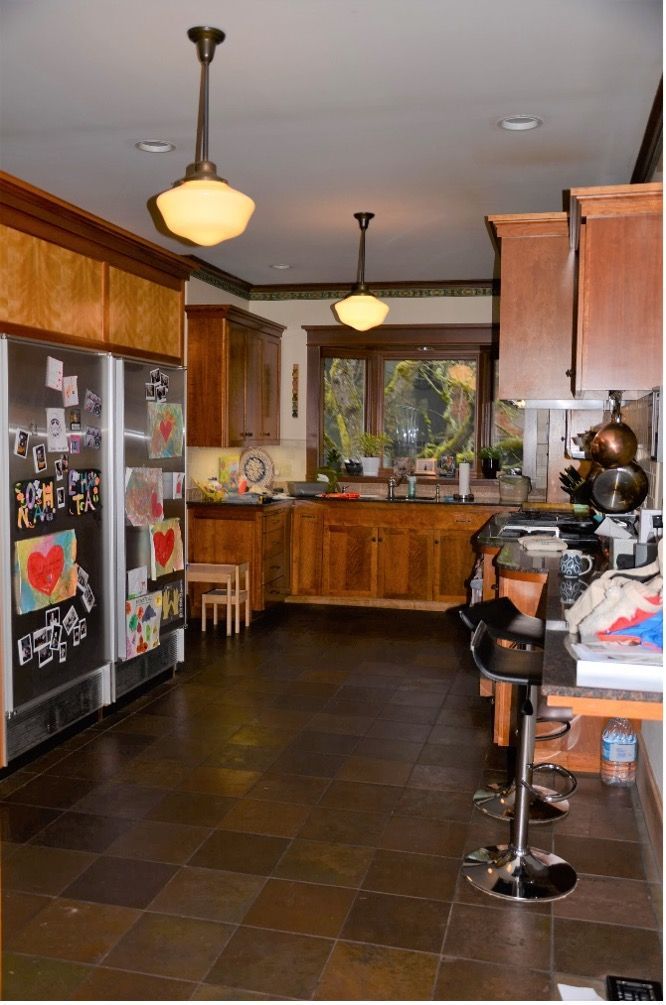
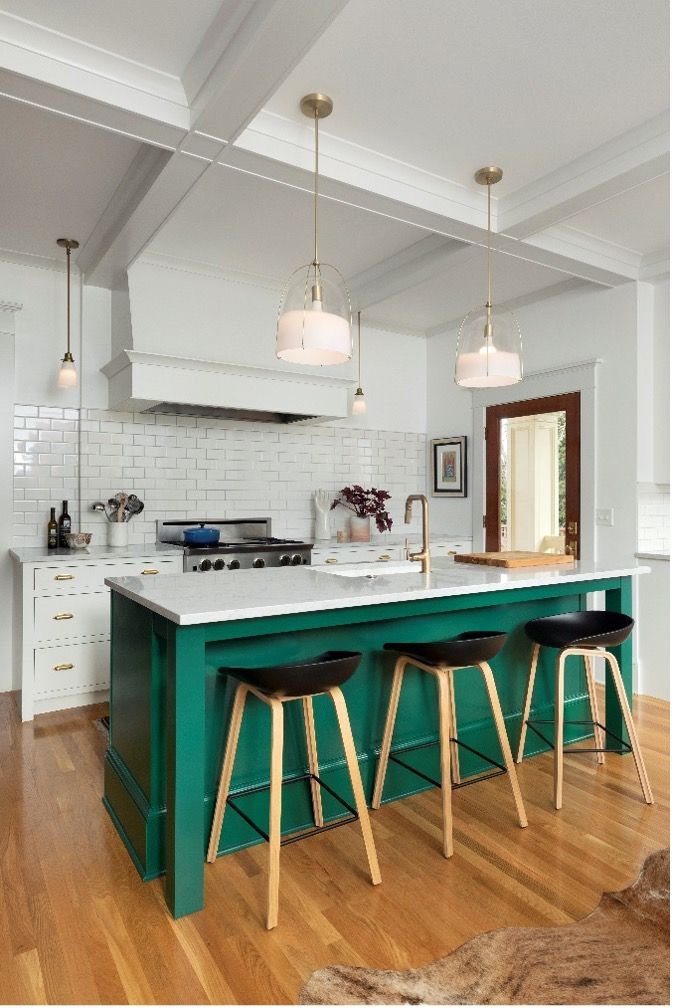
Kitchen before (left) and after (right). Box beams were added to the ceiling in this 1911 home. Some of the beams are structural and some are decorative, creating a pleasing pattern.

Making changes to a structure requires the work of an engineer to get permits. Capturing all the structural information of the home during the site measure ensures that, once the engineer is brought in to do their calculations, they have all the information they need. It is our job to work with the engineer to guarantee that a house with “good bones” remains a house with good bones. 😊

See More Stories

February 24, 2025
Garages in Portland’s vintage homes carry a special blend of character and complexity. Whether you aim to breathe new life into a weathered structure, enhance it for today’s needs, or craft a fresh addition that honors your home’s historic roots, the process demands imagination and care. At Arciform, we draw on years of hands-on experience to guide homeowners through every step—design and construction—delivering results that feel both personal and enduring. Whether your Portland home is a Craftsman bungalow, Tudor, Four Square, or another timeless style, we get the quirks of older properties and the pride you feel in their unique stories. Here is what you need to know to begin with confidence.
February 22, 2025
Everything you need for a mudroom that blends functionality, organization, and style.
Lonesome Pictopia's Northwestlake wallpaper tells complex stories of Northwest nature and history.
By Anne De Wolf January 30, 2025
Explore how patterns, from bold wallpapers to architectural details, can tell stories, evoke emotions, and transform any space with a touch of creativity
By anne November 20, 2024
It’s an old story with a modern twist. You fall in love with a classic beauty. You can hardly see for the stars in your eyes. Hardly hear anything but your pounding heart. You can’t believe she’s all yours! And then you move in together. And the romance ends. Which is where this story begins. We Portlanders love our heritage homes, and we should! They’re charming, well-built, exhibit fine craftsmanship, have lots of stories to tell, and they’re...old. Meaning that they often come with problems, and they don’t have many of the modern conveniences that we’ve come to expect. So how do you update your aging beauty without sacrificing its classic charm? As principal designer at Arciform (a design build firm specializing in vintage homes) for over 25 years, I’ve seen it all – the joys, occasional frustrations, and creative challenges of bringing an older home up to contemporary standards of comfort and efficiency. The Chain Reaction Challenge Although this article is divided into neat headings about electrical, plumbing, and other categories, your old house is proof positive that we live in an interconnected world. Remodeling can often be like a game of Whack-a -Mole, where upgrading one thing involves several other things in a chain reaction. Adding a dormer may first necessitate a new foundation or structural work. Installing new ceiling lighting and fans in your bath may reveal asbestos insulation (asbestos wasn’t banned until 1989) in the attic. Even adding that just-one-more electric appliance may demand a new electrical panel. The trick is to plan the proper succession of remodels (see: Whole House Remodels, Parts 1 - 3) and group projects together. For instance, if you’re going to open a wall to replace a window, that’s the time to modernize wiring, add outlets or lighting, insulate, and address plumbing issues.
Vaulted interior living room of the Edward Dimmit House in the Columbia River Gorge.
By anne November 20, 2024
Perched 800-plus feet above sea level along the scenic Columbia River Gorge is the Edward Dimmit house, built in 1932 for its namesake, one of the early 20th century’s most renown postcard photographers. 92 years later, this sturdy Eclectic Tudor house in the coniferous woodlands of Corbett, Oregon is home to two lighting designers and their pups. Getting Started Edward L. Dimmitt (1881-1963) joined Arthur B. Cross’ photography studio in Portland in 1916. Cross and Dimmitt specialized in scenic photography: the Columbia River Gorge, the then-new Historic Columbia River Highway (built 1913 - 1922) and other scenic landmarks. Selling them as postcards from their Model T, and later from a stand at Crown Point, the adventurous businessmen helped share the wonder of the Gorge with visitors and, thanks to the United States Postal Service, to postcard recipients across the world. Dimmit moved into this house with his wife around 1931. He served for 40 years as the caretaker of the nearby sandstone Vista House at Crown Point (dedicated in 1918). Vista House was not only a place to observe and pay tribute to the history and beauty of the landscape, but also a place for travelers to rest and refresh themselves while exploring the Gorge along the new highway.
By anne November 20, 2024
No man is an island, John Donne famously wrote. No company is, either. Arciform works with many sub-contractors, product designers, and industry nonprofits to achieve stunning remodels and restorations. In this edition of Arcifiles, we introduce you to three dynamic people, each of whom contributes to the creative energy of the design-build community in their own unique way.
SEE MORE STORIES
Share by: